


FAQ > 3D Questions > How can I make my own 3D photos?
Step 1.
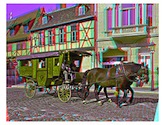
The easiest way is to find a subject that isn't moving, like a chair. Take a photo, then move a couple of inches to the right and take a second photo. Wallah! This is your stereo pair. If you want to take shots of moving subjects, you'll need to build a stereo rig (identical cameras synced together) or use a 3D camera, like the Fuji W3 Real 3D Digital Camera.
Step 2.
Download a free Program called StereoPhoto Maker, and learn it. It's Windows only, but works in emulation (or in Boot Camp) on any Intel Mac. Yes, you can do it in Photoshop, and there are other programs for editing stereo pairs. But trust me - StereoPhoto Maker is the best there is, and it's free (I'm not affiliated, just a fan).
Alternatively:
If you have an iPhone there are a ton of great 3D-photo-creation apps. Use the built in camera to capture the image pair, then bring them into your app of choice for editing (search the App Store for '3D Camera').
One caveat: Detailed editing is difficult on the iPhone's small screen, so even when I do take stereo pairs using my iPhone camera, I'll import them to my computer and do the actual editing in StereoPhoto Maker.
The one 3D iPhone app I do use is called Stereomaker (iTunes link), and it's free. It won't create Anaglyphs, but it will allow you to output side-by-side Parallel and Crossview versions of your 3D image. Stereomaker is a great tool for previewing stereo shots while out and about, and finding the keepers.
Last updated on August 21, 2012 by Patrick